Skin Fitting Installation Tool
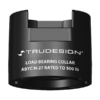
TruDesign Skin Fitting Installation Tool is a world-first which allows the installation of a Skin Fitting to be carried out by a single person. No longer is a second person needed to hold the Skin Fitting in place on the outside of the hull and stop it from turning while the first person on the inside of the hull tightens the Skin Fitting Nut. These tools also act as a holder to make applying sealant or epoxy to the Skin Fitting easier and keep work areas and hands clean.
Works on both standard (Dome head) TruDesign Skin Fittings as well as TruDesign Recessed Skin Fittings. Not for use with TruDesign Skin Fittings with Tails.

Skin Fitting (Thru-Hull) Installation Tools
Skin Fitting (Thru-Hull) Installation Tools make the fitting of our certified Skin Fitting (Thru-Hull) to be carried out quickly and simply by one person – traditionally a task that has required two people, saving time and money. METS Category Winner of the 2016 DAME award. Ideally suited for boat builders.

Installation Tool Operation as follows:
1. Click the TruDesign Skin Fitting Installation Tool onto the correct Skin Fitting/Thru Hull (Recessed or Domed).
2. Apply the chosen marine-grade sealant around the flange of Skin Fitting (Thru-Hull) whilst holding the lower handle.
3. Place into hull.
4. From inside the hull place the backing washer and nut over the Skin Fitting (Thru Hull) Tool.
5. Tighten the nut whilst holding the upper handle of the Skin Fitting (Thru-Hull) Installation Tool.
6. Push the Skin Fitting (Thru-Hull) Installation Tool back out by pinching the side clips, ready for use on the next Skin Fitting (Thru-Hull).

Installation Tool Location & Drilling:
• Skin Fittings with Tail must only be installed above the healed water line.
• Ensure there is enough room on the inside of the boat to allow the Ball Valve to be screwed on without hitting the bulkhead or other parts of the hull.
Note; A “T” handle is available for smaller area locations.
• Ensure the location will not cause the valve handle to be knocked open or closed or damaged by heavy objects.
• Mark the location and drill from the inside a pilot hole 3mm in diameter. Select a hole saw 1 mm larger than the outside thread diameter of the Skin Fitting (Thru-Hull). From the inside, use the pilot hole as a center and drill through the hull with the selected hole saw.

Installation Tool Features:
- Designed and manufactured in New Zealand.
- Manufactured from a glass-reinforced nylon composite – High strength, durable and lightweight.
- Compatible with both Domed and Recessed head TruDesign Skin Fittings from ¾” to 2″ in size.
- Positive ‘click’ to notify once properly engaged with the Skin Fitting.
- Handles for clean and easy handling of a Skin Fitting with sealant or epoxy adhesive applied to it.

How to use the TruDesign Skin Fitting Domed / Thru Hull Install Tool?
Using the TruDesign Install Tool allows one person to fit Skin Fittings (Thru-Hulls) without the need for a “helper” inside the boat at the same time.
Marine adhesive sealants such as 3M Fast Cure 5200, Sika 291i, or Sika 591 can be used. West type epoxy system can also be used, this method makes the Skin Fitting an integral part of the hull. See the attached Technical Information Sheet.
Please read adhesive sealant manufacturers specifications before use.
How do I replace an old Skin Fitting Domed (Thru Hull) with TruDesign?
Replacing an old metallic skin fitting with TruDesign is relatively simple – follow the instructions contained in in the below Technical Information Sheet.


